Someone on Facebook once asked to see pictures of the first tablet woven band people ever made; not the first good one, but the first ever. The first band I made is lost to the mists of time, but I do have a band which I’m sure is the second one I made. After its initial use as a belt at events, it languished for a couple of decades in the back of a drawer and at the bottom of a box. It even spent some time as a cat toy, which led to tattering of tassels..
The question on facebook led me to dig my band out again. It made me realise just how much I’ve learned since I made it! For that alone it gets to stay in my collection of bands and samples.
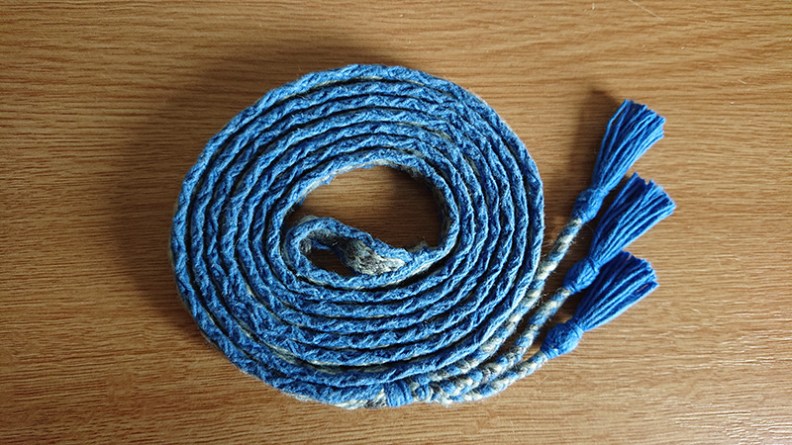
It’s a narrowish piece, about 12-13mm (half an inch) wide, and long enough to be a belt with a section hanging down. One end is sewn into a loop, and the other is finished in three plaits with what’s left of a tassel at the end of each plait. The plaits are 3 lengths, so the tassels hang on a diagonal. The band has blue borders, and white, grey and light blue threads in the pattern section of the band. The pattern is a simple threaded in diamond pattern, where the grey threads form the diamond.
After deciding to keep the belt, I also decided to renovate the tasseled ends. I began by finding a blue cotton yarn, which was pretty close to the blue in the original belt. I cut several equal lengths of the yarn, enough for three modest tassels.
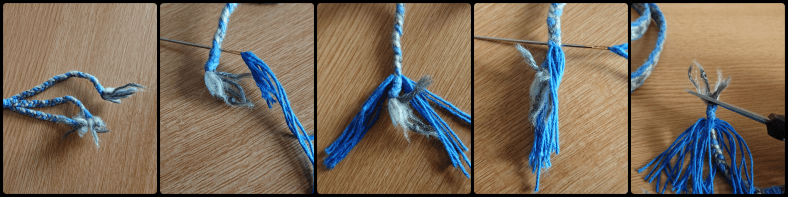
All three original tassels were in a sorry state, so for each one:
- I threaded eight threads through just above the knot/binding, in one direction.
- I turned the plait through 90degrees and threaded through another eight threads, just above the previous eight.
- I flipped the old tassel the wrong way up, and trimmed the tatters away, close to the knot/binding. That knot/whatever forms the core of the head of the new tassel.
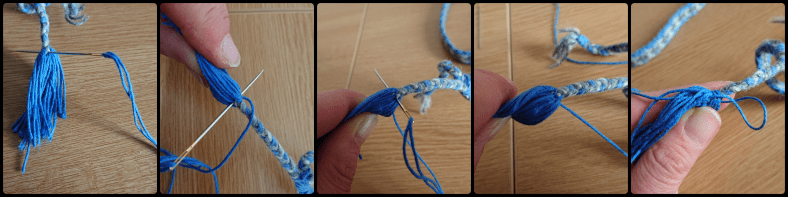
- I flipped the new tassel the right way up, threaded a separate thread through level with the cut threads.
- I wound the thread round several times, covering where the new tassel threads had been threaded through. (This was necessary to make things look a bit more even. It is not a standard part of making or attaching a tassel)
- I then threaded the binding thread down through the tassel.

- Holding the tassel threads together, I brought the binding thread to the outside of the bundle.
- I bound the tassel again, this time below the head.
- I then cut a strip of paper/card and rolled it round the tassel very tightly.
- I pulled the tassel threads down through the card until the shortest one was level with the card edge.
- I then trimmed the excess off as closely and flat as possible, level with the edges of the card.
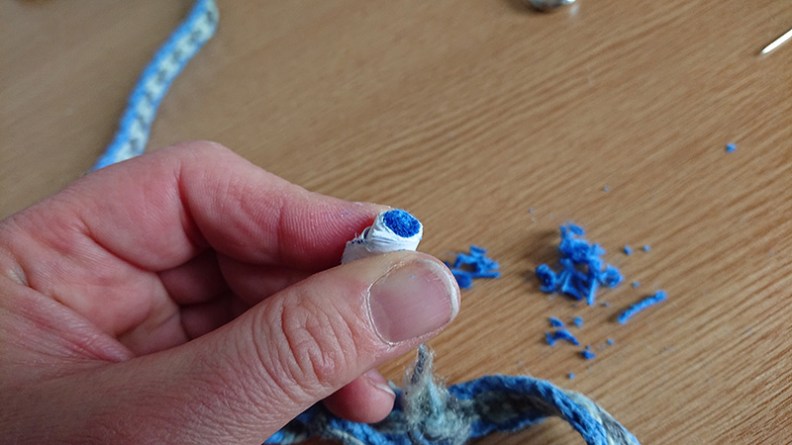
The three newly applied tassels were a definite improvement. They’re not perfect, but they are good enough! And they’re in keeping with the band itself.