

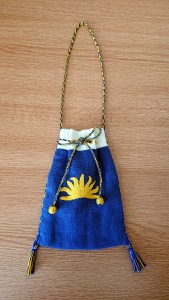
Finding linen offcuts, using up leftover warp threads, using a new embroidery stitch successfully… Oh and making last minute lucet cord and tudor-style wrapped beads! Here lies the tale of a drawstring pouch made of scraps.
I moved house in the summer. Before the move, I’d packed all my craft stuff up, and most of the rest of the house. Then things languished for several months. <looks around at what’s happening in the world /> Being parted from all the fabric, threads and tools for so long was more of an issue than I expected. It drove me up the wall! So when I finally got to set up my new crafting space I had a lot of fun going through all the stash. I discovered a small treasure of linen scraps, and that’s where the fun began.
There were two small pieces of linen, one white, one blue. Both were gifts from a friend. They were the same width, wide enough for a small drawstring pouch, but the blue was a bit too short and the white a little too long. Inspiration struck – use the white as a lining but with a small part showing as a border at the top of the pouch. OK, there was a vague plan…
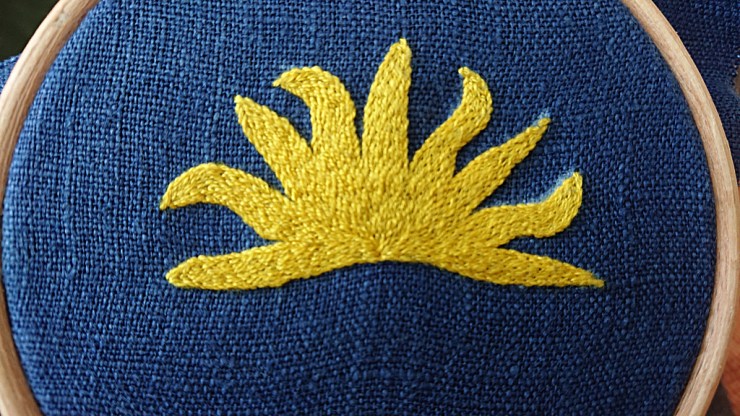
Embroidered motif
I realised this was the perfect opportunity to practice stem-stitch for outlining. I’d recently *finally* learned how to work it effectively, and wanted to see if I could use it for designs that incorporate tight curves or sharp corners. The demi-sun used in the populace badge for Insulae Draconis was either a perfect choice or too much of a challenge. I sketched a demi-sun directly onto the blue linen, and worked the outlining.
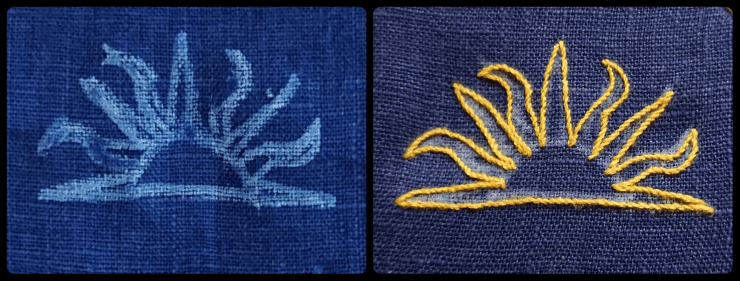
I then decided to do a split stitch filling – and tried to make the stitches radiate from a central point – you decide if I succeeded…
Constructing the pouch
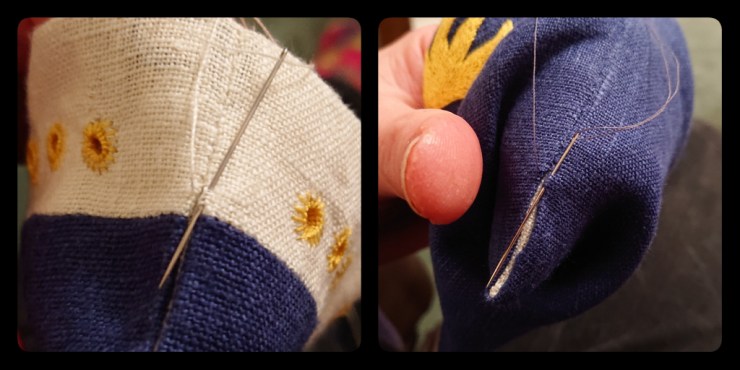
I joined the two pieces of linen along the short edges first, and pressed the seams out flat. With right sides together, I adjusted the positioning of the blue section so that the strips of white at either end were of equal depth. I then stitched the long edges while the fabric was still flat, leaving a small opening in one edge for turning through. I clipped corners, trimmed excess, and turned the piece through to the right side. I folded the piece in half, with the lining outermost, and slip-stitched the sides together on the lining. I then turned it right side out, and did the same to the outer fabric. I like this approach, because the lining is secured in place and cannot shift around inside the pouch.
How to hang it from a belt? A letterbraid!!
Inspired by sweet bags, I decided to make a fingerloop braid. Because I hadn’t done one in quite some time, I decided to make a 10 loop letterbraid inspired by the nun’s book held in the Pitt Rivers museum. I’m interested in replicating braid structures using alternate methods, so I translated the movements from Speiser and Boutrup’s “European Loop Braiding: Part II” for the letterbraid to paired movements on a marudai. So, same braid structure, different construction method (kumihimo).
I made the braid from leftover warp threads. It was long enough to loop over a belt and be attached down the side-seams of the pouch. I incorporated the words: “curiosity concentration perseverance patience = results”. (OK, imperfect results…) As there was enough thread left, I did a couple of extra motifs from the nun’s book, and finished with the word “cake”. After all, by this point, cake was definitely in order!

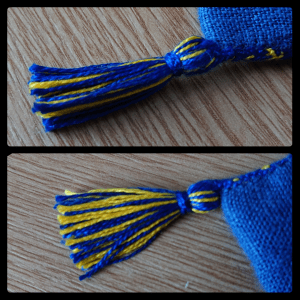
When I attached the braid to the pouch, I left the loose ends (waste thread) from the braid sticking out beyond the bottom edge. I added bulk by attaching extra leftover threads in among the loose ends, which I then made into soft tassels.
Closing the pouch
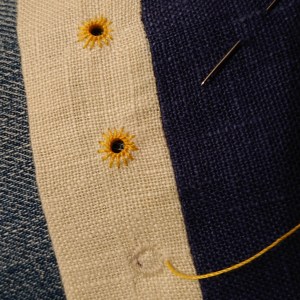
I had finished the top edge earlier with a series of eyelets for a drawstring, mainly because I wanted to practice buttonhole stitch. The seam allowance I’d pressed flat acted as extra support for the eyelets. I admit to cheating with eyelets: I do the preparatory work by machine then hand finish. Unless you look *really* closely, you can’t tell the difference between these and my completely hand-sewn eyelets.
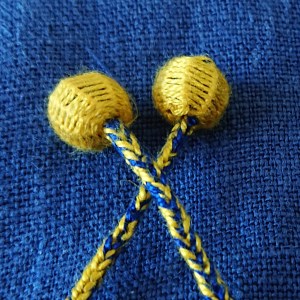
I made a drawstring of lucet cord using two strands of thread, 1 blue and 1 yellow, held together. After threading the drawstring through the eyelets, I finished the cord ends with Tudor-style wrapped bead buttons – just because!
